

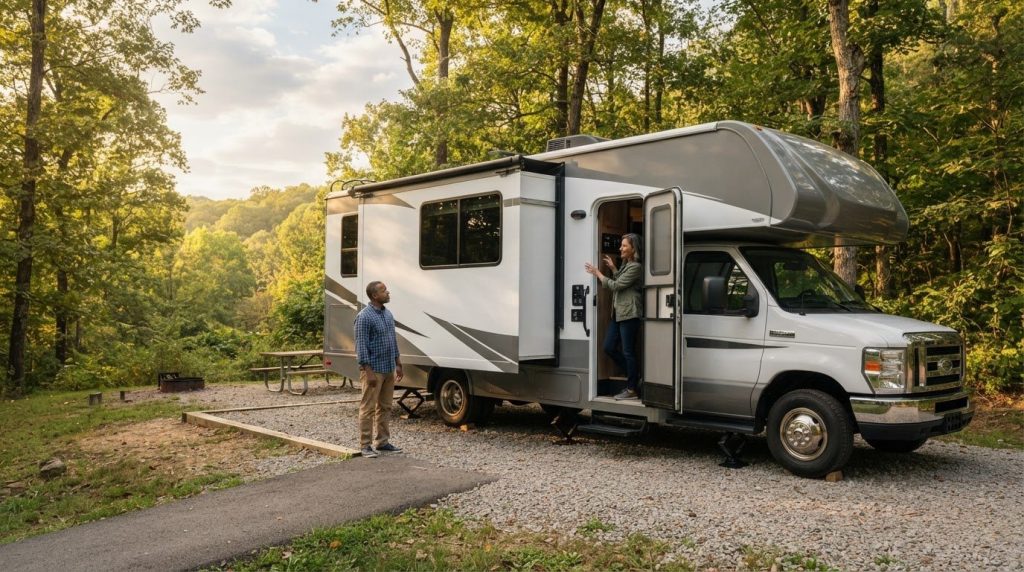
What should you check before pressing the slide-out button? If you’re learning how to operate an RV slide out for the first time, it’s natural to worry about nearby trees, low battery power, or a room that starts moving and then stops. The safest approach is a quick campsite check followed by the instructions for your specific RV.
Before opening the slide, make sure the RV is parked as directed and there’s clear space both inside and outside. Then confirm the power setup and locate the correct controls in the RV’s instructions. Slide-out systems differ, so advice about how long to hold a switch may not fit every model. Follow the unit-specific directions instead of forcing a control or mechanism.
This guide walks you through checking the slide’s path and power, operating the controls, and knowing when to stop if the room doesn’t move as expected. With a calm, repeatable routine, setup can feel less intimidating, whether you’re arriving at an Ohio campsite or settling in around Millersburg.
Key Takeaways
- Learn how to operate an RV slide out for the first time by following the instructions for your specific RV, not a one-size-fits-all routine.
- Check the full slide-out path for people, trees, posts, vehicles, and anything else that could get in the way.
- Use the RV’s controls as directed and watch the room as it extends or retracts.
- If the slide-out hesitates, pause and reassess instead of forcing it. A visible obstruction and a possible mechanical issue call for different next steps.
- Build slide-out checks into your campsite routine, then confirm the room is ready for travel before departure.
What an RV Slide-Out Does, and Why First-Time Operation Needs Care
An RV slide-out is a movable room section built into the side of the vehicle. When extended at a campsite, it creates more interior room than the RV has with the slide closed. That extra space can make it easier to move around, sit together, or settle in after a drive. But the room needs a clear path, and the right operating steps depend on the RV.
A slide-out is a movable part of an RV that extends the living area when parked; an awning is an exterior fabric shade, not a room. The distinction matters: a slide-out moves part of the RV itself, so nearby obstacles and the unit’s instructions deserve attention. The general Recreational vehicle overview also describes slide-outs as a way to expand living space.
How a slide-out changes the RV’s interior space
When extended, the room moves outward from the RV body. Its position changes the interior layout, but the amount and shape of usable floor space depend on the RV’s design. A slide may open up room beside a seating area or bed, for example, while another layout may create space elsewhere. Treat it as part of the parked setup, not an extension to use while driving. Retract it as directed before travel.
That added room also takes up space outside the RV. A tree branch, campsite post, parked vehicle, or person could be in the slide’s path. Check the full route the room will travel, not just the space at its endpoint. The RV’s layout affects how the interior opens up, so check the specific unit rather than assuming every slide moves or creates space in the same way.
Why the exact RV model matters
Slide-outs can use different mechanisms, including rack-and-pinion, cable-driven, or in-wall systems. Their controls and operating directions may differ too. One RV’s switch procedure or stopping cue shouldn’t be treated as a rule for another. If you’re learning how to operate an RV slide out for the first time, start with the instructions for the exact unit and locate its controls before you’re ready to extend the room.
Don’t copy a button sequence from a different RV or an online discussion. Even confident advice may describe another mechanism or model. Read the directions for extending and retracting, and follow any guidance specific to that unit. For a rental, review the operating instructions before using the slide so you know which control belongs to your RV.
A little preparation makes the extra space more enjoyable. Treat the slide-out as a moving part of the RV, not a button to press on guesswork. First prepare the vehicle and campsite, then operate the room using the directions for that specific unit.
Before Pressing the Button: Prepare the RV and Campsite
A calm setup starts before you touch the slide-out control. Once you’ve parked at an Ohio campsite, pause and check the space around the RV, the room’s path, and the instructions for that unit. A walk-around can help you spot a branch or campsite post that’s easy to miss from inside.
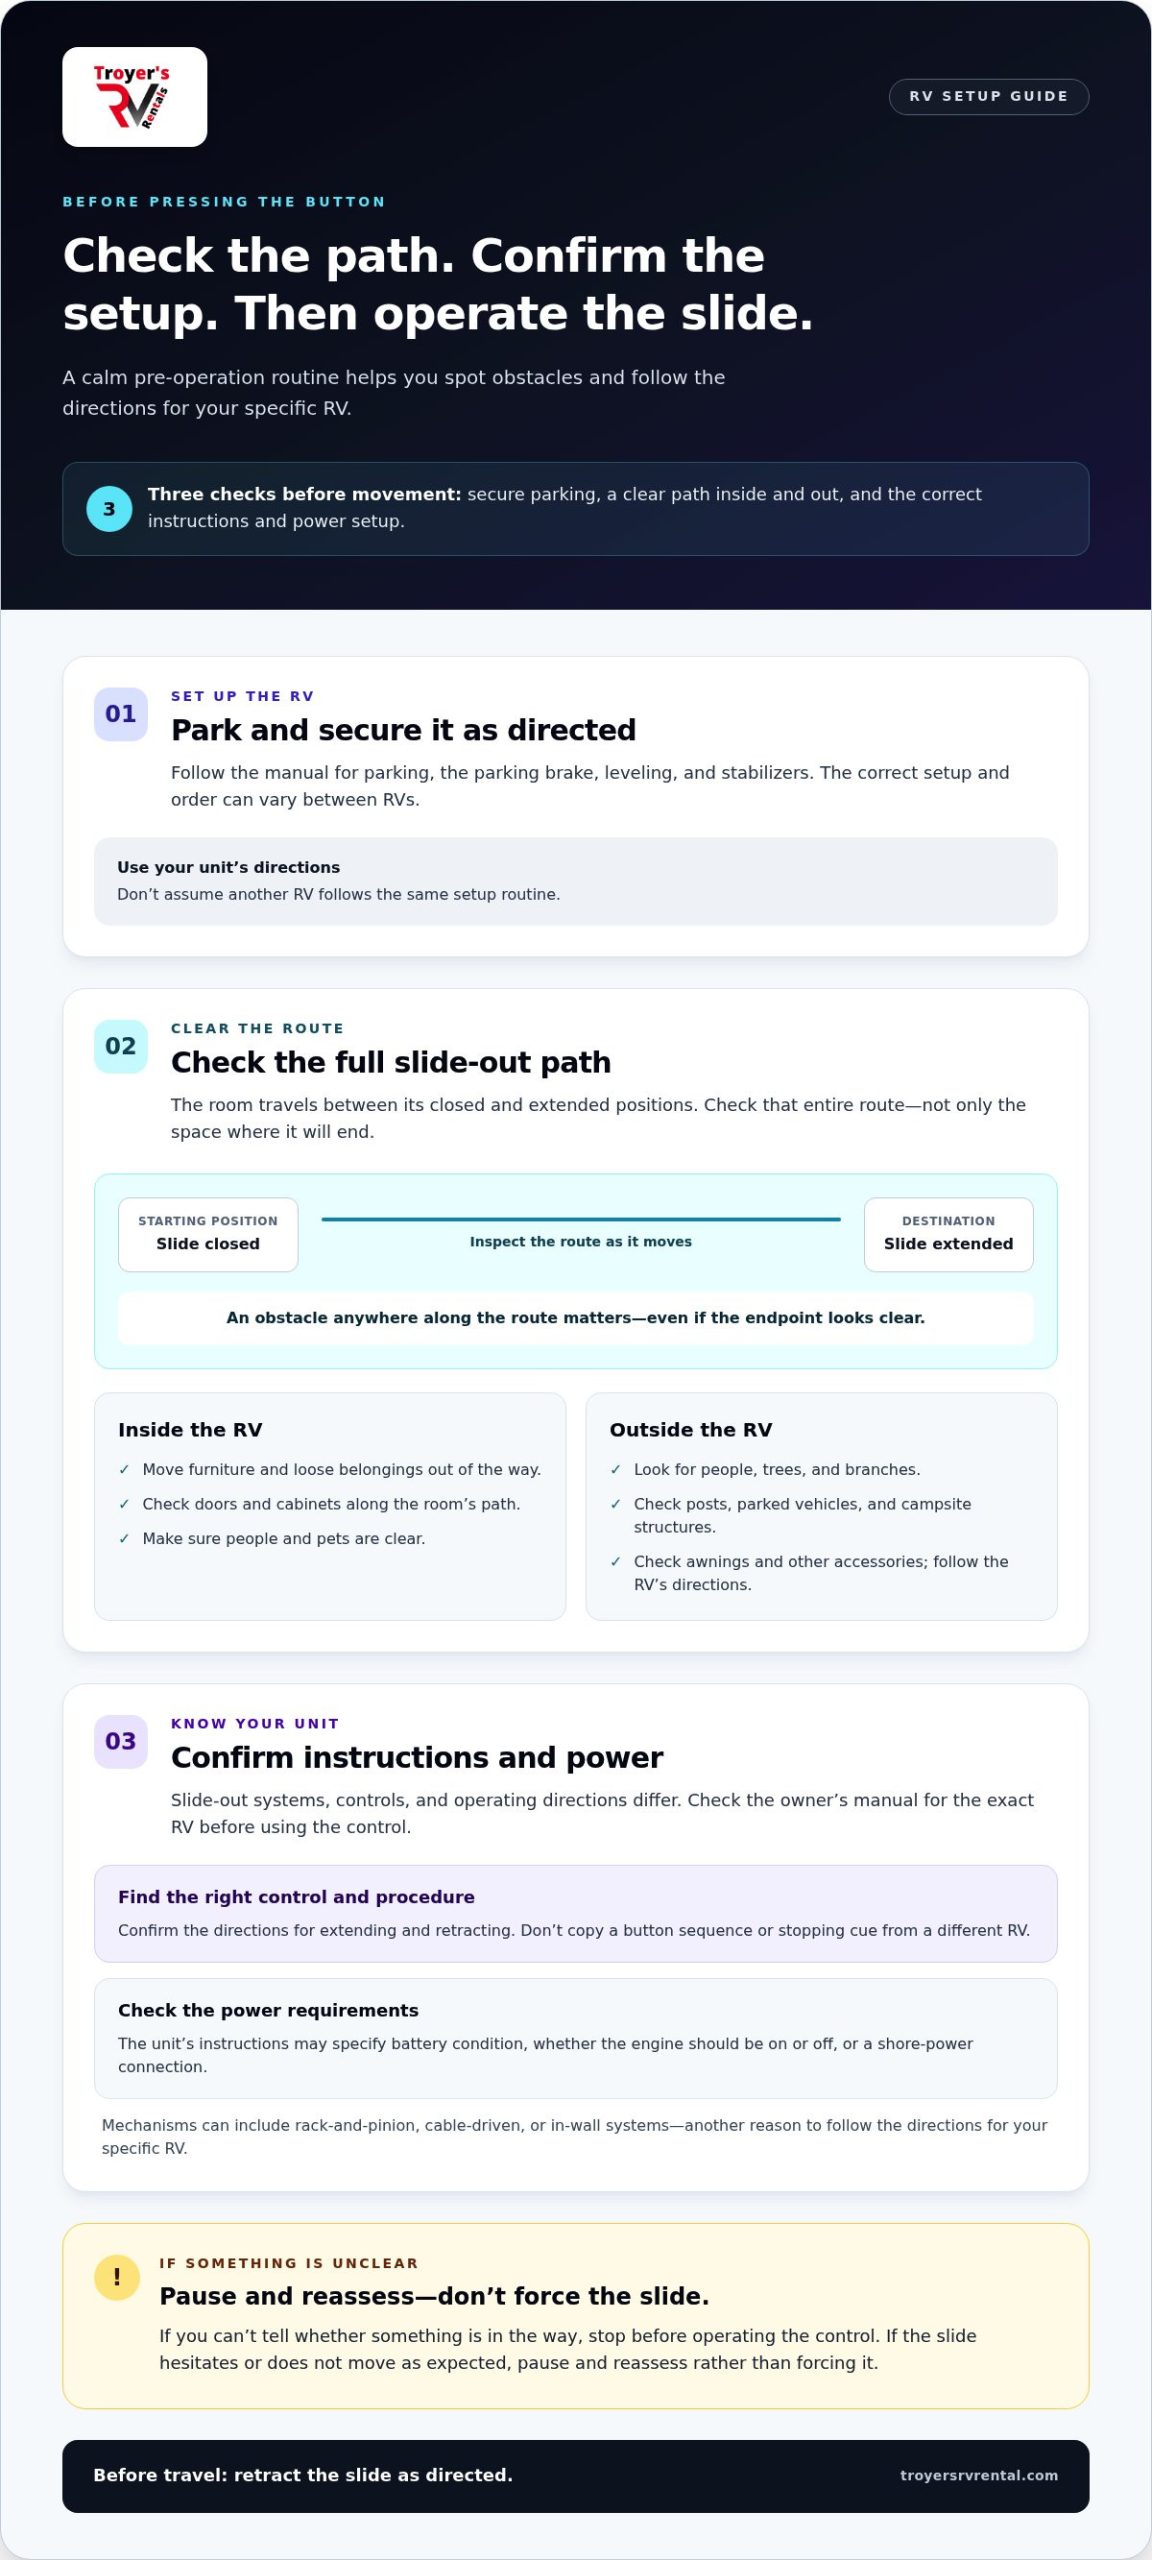
Use this short pre-operation checklist:
- Park securely. Follow the RV’s directions for parking and securing the vehicle.
- Check the full path. Look inside and outside for anything the room could contact as it moves.
- Review the instructions. Confirm setup and power requirements in the owner’s manual.
Check clearance along the slide’s full path, not only at its endpoint. The room passes through the space between its starting and ending positions, so an obstacle along the way matters even if the final spot looks clear.
Check the slide-out’s path inside and outside
Start indoors. Move furniture, loose belongings, and anything else that could block the room’s movement. Check that doors or cabinets won’t swing into its path, and make sure people and pets are clear. Consider where the room will travel, not just where items sit when the slide is closed.
Then walk around the outside of the RV. Look for people, trees and branches, utility posts, parked vehicles, and campsite structures. Check nearby awnings and other accessories too. Their position and clearance can affect the setup, so follow the RV’s instructions about them. If you can’t tell whether something is in the way, pause and reassess before operating the slide.
Confirm parking, leveling, and power instructions
Park securely, then use the manual’s directions for the parking brake, leveling, and stabilizers. These steps can vary between RVs, so don’t assume every unit follows the same order. The manual is your guide to the correct setup for the model you’re using.
Power requirements are unit-specific as well. Before pressing the control, check whether the instructions call for a certain battery condition, the engine to be on or off, or a connection to shore power. Don’t rely on advice from another RV owner if it conflicts with your unit’s directions. If you’re renting, review the control and setup instructions before use, while there’s time to get familiar with them.
If this is your first time learning how to operate an RV slide out, take the preparation one check at a time. A repeatable routine helps you get settled with more confidence, without guessing at the setup. If you’re planning a trip around Holmes County or Millersburg, you can also explore RV rentals as you plan your stay.
How to Operate an RV Slide-Out: Extend and Retract Step by Step
Once the RV is parked and prepared, follow the operating directions for that exact unit. The control may be a switch or another setup, and instructions can vary for how to activate it, how long to hold it, and what signals the room has reached its stop. Don’t rely on a sequence from a different RV or assume every model works the same way. Keep the owner’s manual nearby as you operate.
For anyone learning how to operate an RV slide out for the first time, the key is to stay attentive from start to finish. Use the steps below as a framework, then let the unit’s instructions guide the specific control sequence.
Extending the slide-out at the campsite
Before extending, take one more look inside and outside. Make sure the path is clear, the RV is set up as directed, and the required power conditions are met. Stand where you can see the room move, and keep people clear of its path. If you can’t watch it safely from the control location, ask another adult to observe from a safe spot.
- Identify the correct control. Use the switch or control marked for the slide you intend to extend. Check the manual if the labeling or operation isn’t clear.
- Confirm the unit’s instructions. Follow its specified setup and power requirements. Don’t assume the same conditions apply across RVs.
- Operate as directed. Activate the control using the method described in the manual. Instructions may differ on whether to hold the switch continuously or release it at a particular point.
- Watch the room throughout its movement. Pay attention to its edges and how it travels. Stop if it binds, contacts an obstacle, or makes an unusual sound. Don’t keep operating the control to push through resistance.
- Follow the stated stopping procedure. Some systems have model-specific end-stop guidance. Use the manual’s direction rather than adopting a universal rule about holding, releasing, or ratcheting.
Give the slide your full attention while it moves. Don’t walk away or focus on another task until it has stopped as directed.
Retracting the slide-out before travel
Retracting also calls for a clear path and the right procedure. Before preparing to move the RV, put belongings and people out of the room’s path, then follow the manual’s instructions for bringing the slide in and securing it.
- Clear the path again. Check inside and outside for items or people that could interfere as the room moves inward.
- Use the specified retraction sequence. Confirm any setup or power conditions in the manual, then operate the control assigned to that slide as directed.
- Observe the movement. Keep watching the room as it retracts. Stop if it catches, hits something, or behaves unexpectedly. Don’t force it through a problem.
- Check the travel position. Confirm the slide is fully retracted and secured as the RV’s instructions specify before moving the vehicle.
Use the manual’s end-of-travel directions for both extending and retracting. A control-hold instruction from another RV may not apply to yours. If the room doesn’t move as expected, stop and reassess rather than guessing at a different sequence.
If the Slide-Out Hesitates: What to Do Without Forcing It
A slide-out that slows, stops, or moves unevenly can feel alarming, especially during your first campsite setup. Pause. Stopping to reassess is safer than holding the control longer or trying to push the room into place. A hesitation doesn’t identify the cause by itself, so avoid guessing or treating every sound as a fault.
If you’re learning how to operate an RV slide out for the first time, use a simple rule: stop the control if the room meets resistance, touches an object, moves unevenly, or makes a sound that seems unusual for that unit. Don’t repeatedly cycle the switch to see if it will work on another attempt. Don’t push or pull the room manually.
Obstruction, unusual sound, or interrupted movement
Once movement stops, look for an obvious obstruction only if you can do so safely. For example, a loose item inside or a branch near the slide may be visible. Keep clear of moving parts, and don’t reach into a gap or try to remove anything while the room is moving. If the path is clear but the slide still hesitates, treat the cause as uncertain rather than assuming it needs more force.
Sounds and stopping behavior depend on the RV’s slide system and instructions. A noise that one owner describes as normal may not be a useful guide for another model. Follow the manual’s directions for what to expect at the end of travel. If the slide stops partway, makes an unfamiliar sound, or still won’t move after you’ve safely checked for a visible obstruction, stop and follow the RV’s support instructions. Don’t attempt a repair based on a guess.
Why online advice may not match your RV
Slide-outs may be cable-driven, hydraulic, or electric, and the operating procedure can differ with the system and RV model. That’s why discussions about whether to keep holding a switch, release it at a certain point, or listen for a particular sound can reach conflicting conclusions. People may be describing different equipment, even when their advice sounds specific.
For a rental, the unit’s manual and operating instructions should guide your next step. Online forum advice is no substitute for those directions, especially if it conflicts with them. If you’re unsure what the manual means or the slide’s behavior doesn’t match its instructions, leave the control alone and follow the support guidance provided for that RV. A pause may delay setup, but it’s better than forcing a problem and risking damage.
Before your next trip, get familiar with the RV’s operating instructions as part of your travel planning. Explore Troyer’s RV rentals as you plan a Holmes County getaway.
Make the First Slide-Out Setup Part of a Smooth RV Trip
Your first slide-out setup doesn’t have to be a one-time puzzle. Turn it into a routine you can repeat at each stop: prepare the site, follow the specific RV’s instructions, observe the room as it moves, and check its position before travel. That’s especially helpful in a rental, where controls and procedures may differ from an RV you’ve used before.
Before you set out, take a few minutes to learn which control operates the slide and where the unit’s instructions are kept. Knowing where to look can make arrival and departure feel more settled, even if you’re pulling into an unfamiliar Ohio campsite.
Build a simple arrival-and-departure routine
At arrival, park and prepare the site according to the RV’s instructions. Then check the full path inside and outside before extending the room. At departure, clear the slide area, retract it as directed, and verify that it’s fully retracted and secured for travel. Keep the manual easy to reach, and use the same checks at each campsite instead of relying on memory or guesswork.
- Arrival: Park, prepare the site, and check the slide’s path before extending.
- Departure: Clear the area, retract the slide, and confirm its travel position.
- Every stop: Refer to that RV’s instructions for its controls and setup.
A checklist can be as simple as these three reminders. Repeat them before each operation, even when you’re familiar with the campsite. Conditions change from stop to stop, and a clear path at one site doesn’t mean the next one is clear.
Plan an Ohio RV trip with confidence
Troyer’s RV Rental offers motorhome and camper rentals in Holmes County, including Millersburg. If you’re planning a road trip, the Ohio motorhome rental guide can help you think through your travel plans. If your RV is being delivered, the Ohio RV delivery and setup guide offers more context for getting settled.
When you know the routine and understand the controls for your specific RV, the slide-out becomes one more manageable part of camp setup. Plan your next Ohio getaway and explore Troyer’s RV rentals.
Make Your Next RV Stop Feel Like Second Nature
Your first slide-out setup is a chance to learn the rhythm of your RV. Keep its instructions handy, take your time, and make each arrival an opportunity to build a routine that feels more familiar. With practice, campsite setup can become part of settling in and enjoying the trip, not a source of uncertainty.
If you’re still wondering how to operate an RV slide out for the first time, remember that getting comfortable starts with the specific RV you’ll be using. Choose a motorhome or camper for your next Ohio getaway, including a trip around Holmes County or Millersburg. Troyer’s RV Rental also offers delivery and setup to help you get settled at your destination.
Explore Troyer’s RV rentals for your next Ohio trip, then get ready to make new memories on the road.
Frequently Asked Questions
Can I operate an RV slide-out with the engine running?
It depends on the RV, so check that unit’s manual before operating the slide. One model may have different engine, battery, or shore-power directions than another. If you’re renting, review the instructions for the specific RV before using the control. Don’t rely on a friend’s routine or an online post about a different model, even if its controls look similar.
Is it safe to extend an RV slide-out in the rain?
Rain alone doesn’t determine whether you should extend the slide. Follow the RV manufacturer’s weather guidance, and make sure the campsite setup and slide path are suitable. If the manual includes a weather-related warning, follow it. Once the room is out, use the RV as instructed and pay attention if conditions change, such as wind picking up or water pooling near the RV.
How long can an RV slide-out stay extended at a campsite?
Follow the manufacturer’s guidance for how long the slide can remain extended. The suitable duration can depend on the RV’s design and setup, so don’t assume a routine that worked for a weekend applies to a longer stay. Check the manual for limits related to support or weather. Before retracting, look over the room’s path for belongings or other items that may have shifted.
Can I leave belongings inside an RV slide-out when retracting it?
Only leave items in place if the RV’s instructions allow it and they can’t shift or interfere with the room. For example, a cup left on a table could fall as the slide moves, while a bag near an edge could get caught. Before retracting, check nearby furniture, doors, and loose belongings. If you’re unsure whether something is in the way, move it first.
Do all RV slide-outs use the same control procedure?
No. Controls, power needs, switch timing, and end-of-travel behavior can vary between RVs. If you’re learning how to operate an RV slide out for the first time, use the owner’s manual and instructions for your exact unit. Online discussions may describe one person’s experience with a different system. Treat that as model-specific information, not a substitute for the directions for your RV.
What should I do if an RV slide-out stops before it is fully extended?
Stop operating the control. If it’s safe, check whether something obvious is blocking the room, such as a loose item or an object outside. Don’t push the slide, repeatedly cycle the switch, or try a repair based on a generic tip. Follow the RV’s instructions for what to do next. If you’re renting near Millersburg, use the support directions provided for that rental unit.
Can I use the RV normally while the slide-out is extended?
That depends on the RV’s layout and instructions. Some areas may be easier to reach once the room is out, while other routes or features may still be limited. Check the manual for any restrictions, and keep exits and walkways clear. An extended slide-out is for a parked setup, not travel. Before moving the RV, retract and secure it as the unit’s instructions direct.