
A trailer can look ready while its hitch connection still needs attention. Complete a pre-trip inspection for a rental travel trailer before every trip, and repeat it at the start of each shift if the trailer stays coupled overnight. Check the coupler, pins, and safety chains, then test the lights and onboard systems before towing.
It’s easy to focus on packing and the route ahead, but a steady, repeatable check helps you spot anything left unsecured before you pull away. Give the hitch and safety chains a close look because they connect the trailer to your tow vehicle.
Use this checklist to inspect the hookup, confirm the trailer lights work, and check key water, battery, propane, and appliance systems. You’ll also learn what to secure inside and outside before departure, so you can follow a clear routine and avoid last-minute surprises.
Key Takeaways
- Inspect the trailer before every trip, following the same routine so key checks are less likely to be missed.
- Walk around the trailer to spot unsecured storage doors, open vents, raised antennas, or visible damage.
- Test the lights and electrical connection before towing, and make sure the trailer’s signals are working.
- Check the hitch connection and safety chains carefully, then confirm the trailer’s water, waste, battery, propane, and appliance systems are ready.
What is a trailer pre-trip checklist?
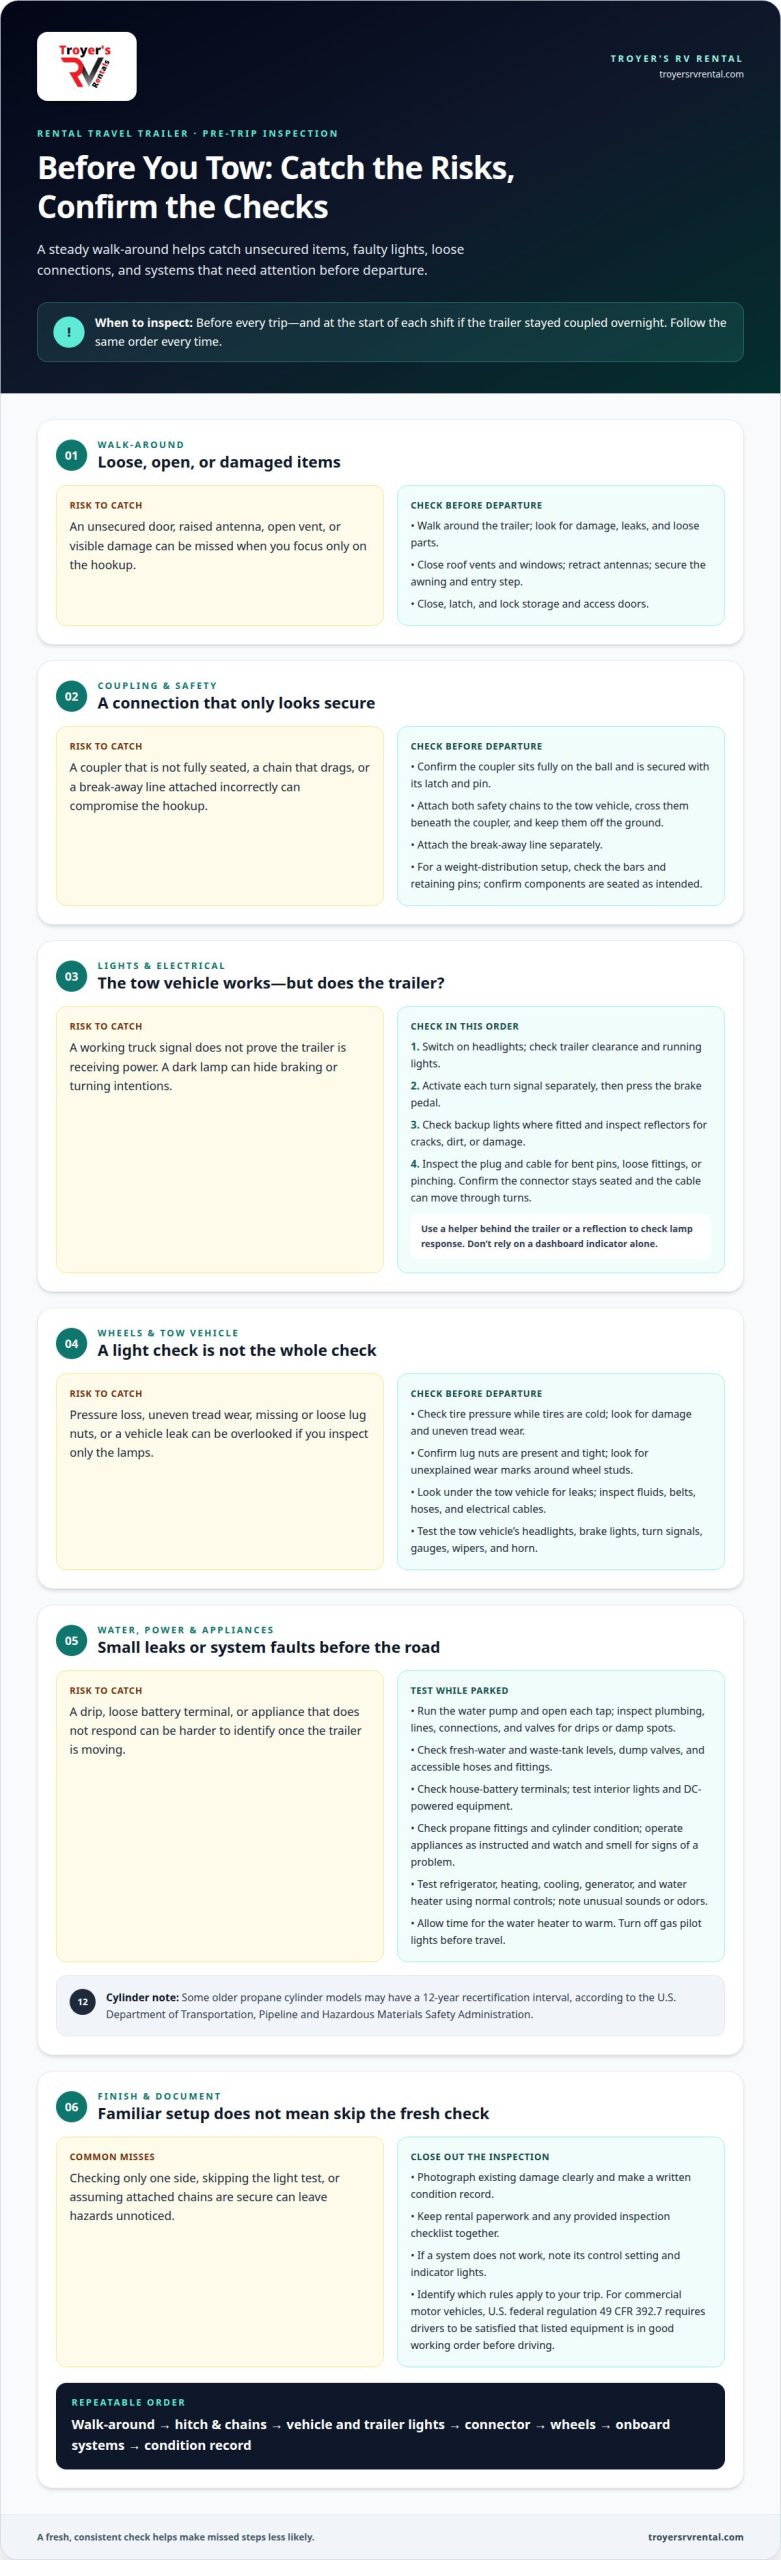
A trailer pre-trip checklist is a repeatable walk-around before towing. Complete a pre-trip inspection for a rental travel trailer before every trip, or at the start of each shift if it stayed coupled overnight. Use the same order every time. A consistent routine makes it easier to notice an unsecured door, damaged light, or loose connection.
For commercial motor vehicles, U.S. federal regulation 49 CFR 392.7 requires drivers to be satisfied that listed equipment is in good working order before driving. That equipment includes brakes, steering, lights, tires, horn, wipers, mirrors, coupling devices, wheels, and emergency equipment. Requirements for other towing situations depend on applicable rules, so identify which rules apply to your trip.
- Walk around the trailer body and look for visible damage, leaks, or loose parts. A fresh scrape or fluid spot can be easier to identify before departure.
- Close roof vents and windows, retract antennas, and secure the awning and entry step. These items can catch wind or strike nearby objects if left open.
- Check storage and access doors, confirm their latches hold, and lock them. A door that swings open can create a road hazard or let belongings fall out.
- Test the lights, turn signals, gauges, wipers, and horn. Check the camera display too, if the tow vehicle or trailer has one.
- Look under the tow vehicle for leaks, then inspect its fluids, belts, hoses, and electrical cables. Wear, loose fittings, or visible leaks can signal a problem before towing.
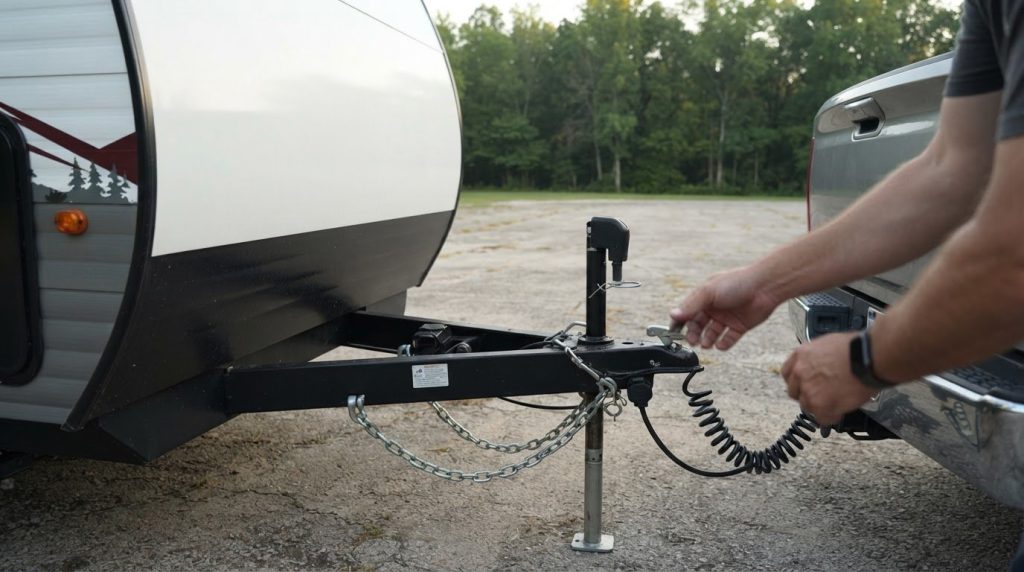
At the hitch, confirm the coupler sits fully on the ball and is secured with its latch and pin. Attach both safety chains to the tow vehicle, cross them beneath the coupler, and keep them clear of the ground. Check that the break-away line is attached separately. For a weight-distribution setup, inspect the bars and retaining pins, then confirm the hitch components are seated as intended.
Before leaving, document existing damage with clear photos and a written condition record. Keep the rental paperwork and any provided inspection checklist together so you can distinguish pre-existing marks from damage noticed later.
Common mistakes include checking only one side, skipping the light test, or assuming the chains are secure just because they’re attached. A dragging chain, unlatched storage door, or missed leak can create a towing risk. Treat every pre-trip inspection for a rental travel trailer as a fresh check, even when the setup looks familiar.
Lights, reflectors, and electrical connections
Test the lights with the trailer connected and the tow vehicle parked safely. Ask a helper to watch from behind, or use a reflection to confirm each lamp responds. Check the tow vehicle’s headlights, brake lights, and turn signals, too. A working signal on the truck doesn’t prove the trailer lights are receiving power.
- Switch on the headlights and check the trailer’s clearance lights and other running lights.
- Activate each turn signal separately, then press the brake pedal and confirm the trailer responds.
- Check backup lights where fitted, and inspect reflectors for cracks, dirt, or damage.
- Look over the electrical plug and cable for bent pins, loose fittings, or pinching.
- With the vehicle stationary, gently confirm the connector stays seated while the cable has room to move through turns.
A failed light can make the trailer harder to see and hide your braking or turning intentions from nearby drivers. If a lamp stays dark, check that the connector is fully seated and the cable isn’t strained. Recheck the plug and lamp response before towing. Don’t rely on a dashboard indicator alone; check the lights themselves.
Include the wheels in this pass. Check tire pressure while the tires are cold, and look for damage or uneven tread wear. Confirm lug nuts are present and tight, and look for unexplained wear marks around the wheel studs. Pressure loss or a loose lug nut is easy to overlook if you inspect only the lamps.
Use the same sequence each time: vehicle lights, trailer lights, reflectors, connector, then wheels. That order gives you a repeatable checklist and makes a missed step less likely. If you’re planning a trip and need a towable option, browse camper rental options.
RV water, waste, battery, propane, and appliance systems
Test the trailer’s systems while it’s parked and connected as directed. Start with the water pump, taps, and visible plumbing. Run the demand pump, open each tap, and inspect lines, connections, and valves for drips or damp spots. Check outside for fresh leaks, cracked fittings, or cracks in accessible hoses. A small leak can be harder to spot once the trailer is moving.
- Read the fresh-water and waste-tank levels, then check the dump valves. Knowing the starting levels helps you plan water use and waste handling.
- Inspect house-battery connections for secure terminals, then test interior lights and DC-powered equipment. Loose connections can interrupt power to onboard systems.
- Check propane fittings for tightness, then operate each appliance according to its instructions. Watch and smell for signs of a problem while it runs.
- Check the propane cylinder’s condition and label. Some older propane cylinder models may have a 12-year recertification interval, according to the U.S. Department of Transportation, Pipeline and Hazardous Materials Safety Admin.
- Test the refrigerator, heating, cooling, and generator using their normal controls. Confirm each responds as expected, and note any unusual sound or odor.
- Check the water heater and confirm it produces hot water. Allow time for the system to heat before deciding it has failed.
- Turn off gas pilot lights before travel. This keeps appliances from operating with a flame during the drive.
Keep the test simple and observe each system in turn. If the water pump runs but no tap delivers water, inspect the water supply and accessible valves. If an appliance doesn’t start, note its control setting and any indicator lights instead of repeatedly cycling it. Leave brake-system checks and advanced electrical diagnostics to trained technicians.
Trailer coupling, safety chains, and hitch inspection
Give the connection its own careful check before moving. A trailer can appear attached while the coupler latch, retaining pin, or electrical plug remains unsecured. Keep the tow vehicle and trailer stationary during inspection, and follow the hitch maker’s instructions for your specific setup.
- Confirm the coupler is fully seated over the hitch ball, then close its latch and install the retaining pin. A partly seated coupler can separate under towing forces.
- Inspect the hitch ball, coupler, and visible mounting points for cracks, bends, or loose hardware. Stop if any part looks damaged or shifts unexpectedly.
- Attach both safety chains to the tow vehicle’s designated connection points. Cross them beneath the coupler and leave enough slack for turns, without letting them drag.
- Connect the break-away line to its separate attachment point. Keep it clear of the chains and able to move freely.
- For a weight-distribution hitch, check that the bars are seated and their retaining pins are secure. Confirm the trailer and tow vehicle sit level rather than visibly nose-high or nose-low.
- Plug in the electrical connector and check that its cable has room to move through a turn. A strained or pinched cable can interrupt lights or other connected functions.
Look inside the trailer before departure, too. Secure loose items and close interior doors, cabinets, and drawers so shifting cargo doesn’t distract the driver or affect the load.
If the coupler won’t latch, a chain is damaged, or another safety defect appears, don’t tow the trailer. Record the problem and contact the rental company for instructions before moving it.
Take a final look at the hitch after connecting, then repeat the check if the hookup changes. If you’re planning a trip and need a towable option, explore camper rentals.
Troyer’s RV Rental
Troyer’s RV Rental offers RV, motorhome, and camper rentals for travelers in Millersburg, Ohio. Once you’ve reviewed your towing setup and inspection routine, consider whether a camper or motorhome rental better suits your trip. Fishing boat rentals are another option for time on the water, and monthly RV rentals can fit extended stays.
A clear pre-trip routine helps you know what to inspect before towing and what to secure before departure. If a trailer connection or safety item raises concern, pause the trip rather than towing with a known defect. For help choosing a rental that fits your plans, contact Troyer’s RV Rental.
Make Your Next Trip Easier to Start
A pre-trip inspection for a rental travel trailer can help set the stage for a calmer travel day. Build breathing room into your departure plan so loading, connecting, and reviewing your route don’t all compete for attention at once. Choose a meeting point with enough space to prepare without rushing, and make sure everyone knows where essential items are stored.
For a shared trip, decide who will handle navigation, watch for clearance, and help guide the driver through tight turns. A simple plan keeps communication clear as the scenery changes and the road narrows. Once you’re underway, take breaks when needed and revisit your plans if conditions change.
Ready to talk through your travel plans and rental options? Contact Troyer’s RV Rental. A little planning now can help set the tone for a more enjoyable getaway.
Frequently Asked Questions
How often should you complete this checklist?
Complete the checklist before every trip. If the trailer stays coupled overnight, repeat the inspection at the start of each shift. Treat a change in plans, a stop, or a new driver as a reason to review the relevant checks again. A familiar sequence helps you notice changes, such as a new tire mark or a connector that has worked loose.
What should you check during a pre-trip inspection of a rental travel trailer?
Check the trailer from the outside, inside, and outside again. Look over the body, tires, storage doors, vents, and lights; then inspect the living area, systems, and stored items. Finish with another walk-around to catch anything left unsecured during your interior check. Include the tow vehicle and hitch connection, since the trailer and vehicle travel as one combination.
How do you inspect trailer tires, wheels, lug nuts, and tire pressure before towing?
Check tire pressure while the tires are cold, using the tire manufacturer’s specifications. Look for cuts, bulges, cracking, uneven tread wear, or objects lodged in the tread. Confirm each lug nut is present and tight, and look for unexplained marks around the wheel studs. Recheck pressure at intervals during travel, especially after a noticeable change in handling.
How do you check trailer lights, brakes, breakaway switch, and electrical connections?
With the trailer connected, test its turn signals, brake lights, headlights, backup lights, and clearance lights, then inspect the plug and cable for a secure, unpinched connection. Confirm the break-away line is attached. Leave brake-system checks and advanced electrical diagnostics to trained technicians. If a light fails or the connection is damaged, stop before towing and address the defect.
What should you inspect inside a travel trailer before leaving, including appliances and propane?
Run the appliances using their normal controls and note whether the refrigerator, heating, cooling, and other equipment operate. Check propane fittings for tightness while watching and smelling for signs of a problem. Turn off gas pilot lights before travel. Secure refrigerator contents, close cabinet doors and drawers, and place heavy belongings in floor-level storage to limit shifting while underway.
How do you check for water leaks, plumbing problems, and secure interior items?
Run the demand pump and open the taps, then inspect accessible lines, connections, and valves for drips or damp areas. Look beneath the trailer for fresh leaks, too. Secure interior doors, cabinets, and drawers, and keep heavy items low. If you find a leak, identify its location and keep the affected system off rather than traveling with water escaping.