
An auto-leveling system doesn’t make leveling blocks obsolete. Knowing how to use RV leveling blocks lets you raise a low side a few inches before the system fine-tunes your camper on relatively even ground. Blocks can also help when the terrain is too uneven for the leveling system to work comfortably.
It’s easy to assume an automatic system can handle every campsite, but it’s designed to fine-tune leveling, not compensate for a steep or uneven parking spot. A level camper is more than a comfort issue: a tilt can affect how slides sit and how appliances work. This guide explains how to check side-to-side and front-to-back level, place blocks safely, and use stabilizer jacks for support rather than lifting. You’ll also learn when to combine blocks with auto leveling and when to choose a more level spot. Take it one step at a time, and setting up will feel much easier.
Key Takeaways
- Place blocks at the wheels that need raising and approach them slowly to avoid rolling past the right position.
- Correct side-to-side tilt before adjusting front-to-back, then recheck that the camper is steady.
- Use blocks to help an auto-leveling system on uneven ground, rather than asking the system to make up for a large height difference.
- After leveling, lower stabilizer jacks for steadiness; don’t use them to lift the camper.
Do I Need Leveler Blocks If I Have an Auto Leveling System?
- Check the site before relying on auto leveling. Park on the firmest, most even ground available, and avoid an obvious hill. An electric leveling system is designed to fine-tune the camper on relatively flat surfaces. It can be damaged if it must compensate for significantly uneven ground. Blocks can bridge a few inches of difference before you engage the system. If the site has a grade of 5 to 10%, add safety measures, including wheel chocks and stabilizer jacks.
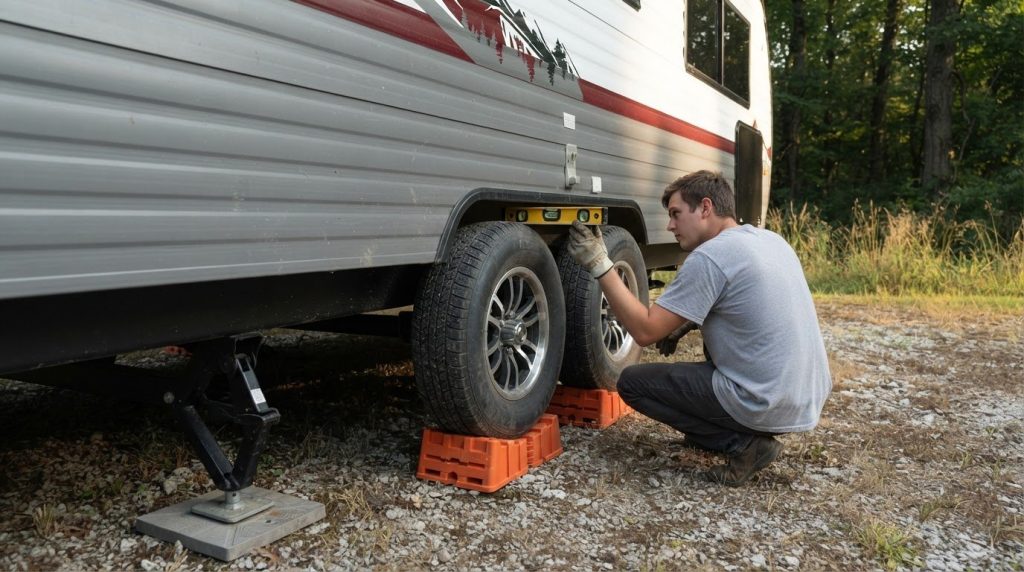
- Position curved levelers at the low-side tires. Check side-to-side level with a bubble level, then place each curved leveler directly in front of the tire that needs raising. Align the leveler with the tire’s path. With a guide outside the camper, drive slowly onto the curved surfaces and stop when the bubble shows the camper is level. Avoid sudden acceleration, and don’t let the tire roll beyond the needed height.
- Chock the wheels to prevent movement. Once a towable camper is level side to side, place chocks on both sides of each tire, not on top of a leveling block. This helps prevent the wheels from rolling off the blocks. For other RV setups, position chocks to prevent movement in either direction. Keep them snug against the tires, and don’t remove them while the camper is resting on blocks.
- Prepare the jacks before engaging auto leveling. Lower stabilizer legs until they sit just above the ground or leveling blocks. Then engage the electric system for small adjustments. Don’t use stabilizer jacks to lift the camper. If the system struggles on uneven ground, reposition the camper or use manual blocks as a backup.
- Support jacks on soft ground. Place jack pads beneath hydraulic jacks to help prevent them from sinking. Plywood can also provide a broader, more solid base beneath a jack or leveling block. After leveling, confirm the camper is steady and the chocks are in place before extending slides or settling in.
Checking side-to-side and front-to-back level
Keep a travel trailer’s tires centered and fully supported on stable blocks, then make small adjustments. Pull onto blocks slowly rather than forcing a tire up a steep step, which can strain the tires or suspension.
- Check side-to-side level first. Park the vehicle, then use a bubble level inside the camper to identify the lower side. Place it on a firm, level surface, such as the floor, and note whether the bubble shifts toward the driver or passenger side. Make side-to-side adjustments before front-to-back changes.
- Place blocks beside the low-side tires. Set the blocks in front of the wheels on the side that needs raising. Center each block with its tire so the tire climbs straight and the weight stays evenly supported. If both directions need adjustment, start with the lowest corner.
- Raise the low side gradually. Ask a guide to watch the tire and blocks as you move the trailer forward slowly. Stop when the bubble shows the camper is level side to side. If the tire passes the target, pull clear and reposition the blocks rather than making a sharp correction.
- Secure the wheels before changing direction. After leveling a towable RV side to side, place wheel chocks on both sides of each tire, not on the leveling block. Keep the chocks snug against the tires so the trailer stays stable while you adjust its front-to-back position.
- Adjust front-to-back level last. To correct front-to-back level with blocks, place them beneath the front or rear wheels as needed. On a travel trailer or fifth wheel, use the tongue jack or landing jack after the side-to-side adjustment. Lower stabilizing jacks onto jack pads, then check the bubble inside again before settling in.
When to Use Stabilizer Jacks and Leveling Blocks Together?
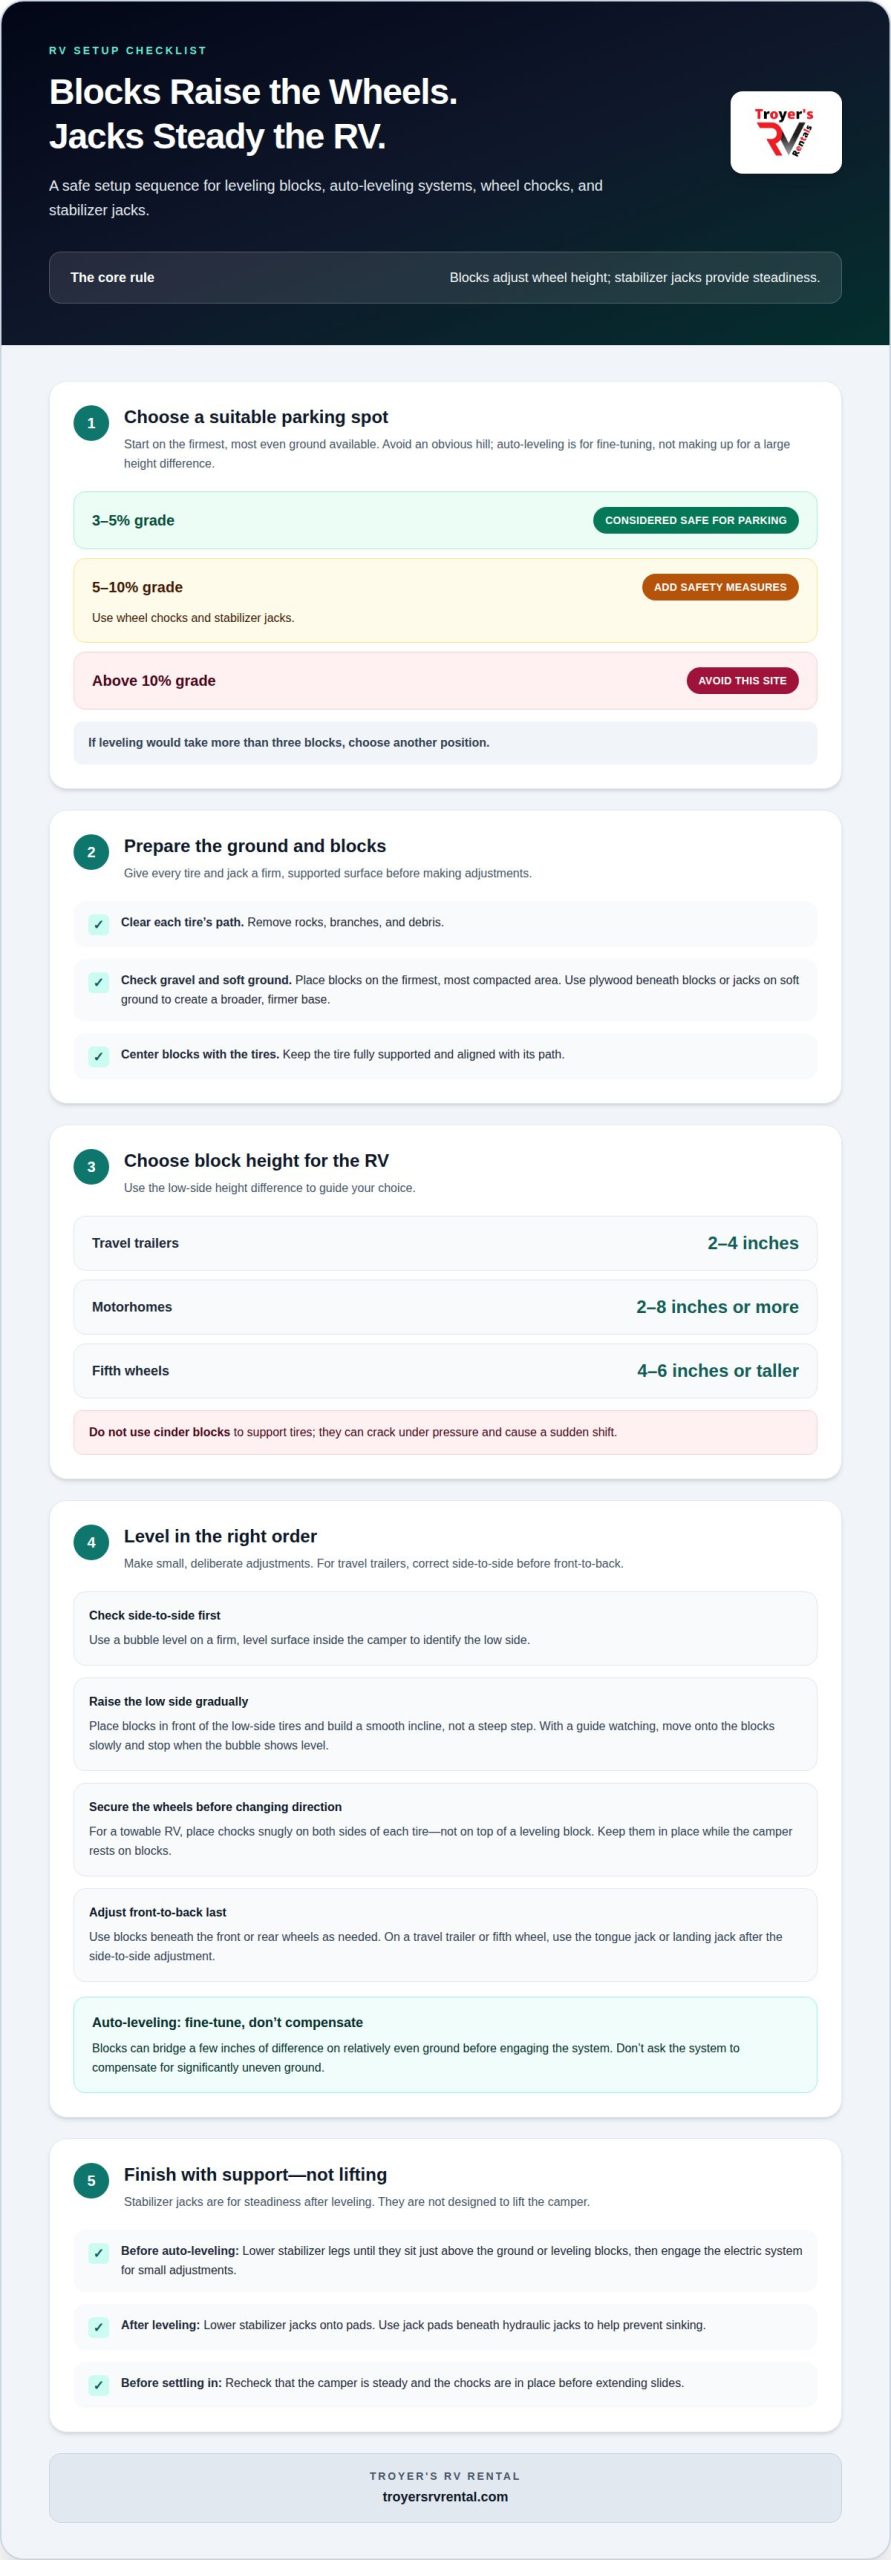
Leveling blocks raise the wheels; stabilizer jacks steady the parked RV. Use both when the wheels need adjusting and the camper needs extra stability afterward.
Compared with jacks, blocks or ramps support the tires directly; 2×6 wood planks are another option. On soft ground, plywood can create a broader, firmer base beneath blocks or jacks.
- Choose a relatively even parking spot. Avoid an obvious hill, soft ground, and a site graded above 10%. A grade of 3 to 5% is considered safe for parking. If leveling would take more than three blocks, choose another position. A stable starting surface supports comfort and helps the trailer sit properly.
- Inspect and clear the ground. Remove rocks, branches, and debris from each tire’s path. Gravel can shift beneath the camper, so position blocks on its firmest, most compacted area. If the ground feels soft, place plywood under the blocks to spread the weight and reduce sinking.
- Choose block height for the RV and slope. Travel trailers generally need blocks 2 to 4 inches high. Motorhomes may need 2 inches to 8 inches or more; fifth wheels may need stacks 4 to 6 inches or taller. Let the low-side height difference guide your choice, not the refrigerator or comfort alone.
- Build a gradual ramp and center each block. Align blocks with the tires so the weight is supported evenly. Stack them into a smooth incline, not a steep step. Cinder blocks can crack under pressure and cause a sudden shift, so don’t use them to support tires.
- Lower stabilizer jacks only after leveling. Jacks steady the camper; they aren’t designed to lift it into level. Once blocks have raised the wheels and the trailer sits level, lower stabilizer jacks onto pads. On soft ground, pads or plywood provide a broader footing for each jack.
Why leveling a camper matters
- Protect the camper from uneven stress. A parked RV that leans can put extra pressure on unsupported parts. Over time, that strain can contribute to wear or warping. Before settling in, adjust the blocks or leveling system until the camper sits properly. Then confirm its tires and supports remain steady.
- Help appliances function as intended. A tilted RV may affect how its refrigerator and air-conditioning systems cool. When the RV tilts, they may not cool correctly. Check the bubble level before running appliances during a long camping stay. A level floor also makes everyday tasks, like setting a cup on the counter, more comfortable.
- Protect slide operation and seals. An unlevel camper can cause slides to extend or retract unevenly. That movement can affect how they seal and may contribute to component failure. Keep slides in while leveling, unless the manufacturer recommends otherwise. Extend them only after the camper is level and stable.
- Support drainage and tank readings. Proper leveling helps wastewater drain into the waste water tanks. A tilted RV can also cause holding-tank monitors to display incorrect information. If a reading seems inconsistent, consider the camper’s position before assuming the tank level has changed. Recheck the ground and level after heavy rain or strong winds.
- Make a final stability check before using the space. Walk through the camper after leveling. Notice whether doors swing, items shift on counters, or the floor feels tilted. Confirm the supports are secure and slides move evenly. If the camper has shifted, adjust its position before continuing your stay. These simple checks help protect the RV’s components and keep the interior comfortable.
Ready to enjoy a more comfortable camping stay? Plan your next camper trip with a level setup in mind.
Troyer’s RV Rental: Camper Rentals
Troyer’s RV Rental offers camper rentals for travelers planning a camping trip, whether it’s a short getaway or a longer stay. After learning how to level a camper, put those steps to use as you settle into your campsite and check the ground before parking.
Choose a camper rental when you want to explore without owning an RV. If your plans call for a different kind of trip, Troyer’s RV Rental also offers motorhome rentals, fishing boat rentals, and monthly RV rentals. A level setup can help protect the camper’s components and make time inside more comfortable, so include blocks and chocks in your arrival routine.
Have a trip in mind? Contact Troyer’s RV Rental to talk about camper rentals.
Make Your Next Trip Easier to Settle Into
A smooth arrival starts before you reach the campsite. Think about the ground, your parking approach, and where you’ll place your leveling gear. With a little preparation, knowing how to use RV leveling blocks can become part of an easy routine, leaving more time to enjoy the trip.
When planning your next getaway, choose the kind of travel that fits your plans. Troyer’s RV Rental offers camper and motorhome rentals, as well as fishing boat rentals for time on the water. Each option can shape a different outing, from a road trip to a fishing-focused escape.
Ready to plan your next adventure? Contact Troyer’s RV Rental and take the next step toward getting out there. Your next camping memory is waiting!
Frequently Asked Questions
Does an RV Need to Be Perfectly Level?
No, the goal is a stable camper that’s close to level, not mathematical perfection. Use a bubble level as a practical guide, and avoid leaving the RV noticeably tilted. Small differences matter less than a secure setup where the tires remain supported and doors, appliances, and interior items function normally during your stay.
What Are Common Types of RV Leveling Blocks?
Common options include curved drive-on levelers and stackable blocks that build height beneath a tire. Wood planks, including 2×6 boards, can also serve as supports when positioned securely. Choose a type that fits the tire and the ground, then use a gradual approach rather than creating a sharp step. Avoid cinder blocks, which can crack under pressure.
When Leveling an RV, Should the Wheels Be Off the Ground?
No. Keep the wheels resting securely on the ground or on properly positioned leveling supports. Lifting a wheel off its support can shift weight onto other parts of the RV and make the setup less stable. If an adjustment would leave a tire suspended, lower the RV and choose a more suitable parking position.
Why Is It Important to Level an RV?
A level RV helps its systems and interior work as intended during a stay. A persistent tilt can affect appliances, slide movement, drainage, and tank-monitor readings. It can also make ordinary tasks, such as cooking or sleeping, less comfortable. Treat leveling as part of setting up camp, not just a way to make the vehicle look straight.
How do you level an RV using leveling blocks step by step?
Park on firm ground, then use a bubble level to find the low side. Place blocks in line with the low-side tires and move the RV onto them slowly. Recheck the level, secure the wheels with chocks, then make any front-to-back adjustment. Finish by lowering stabilizers for steadiness and checking the setup again.
How do you determine which side of an RV needs leveling?
Set a bubble level on a steady surface inside the RV, such as the floor, and watch where the bubble moves. Its position shows which side sits lower. For a second check, place the level across a stable surface near the center of the camper. Use the reading to determine where support needs to raise the vehicle.