
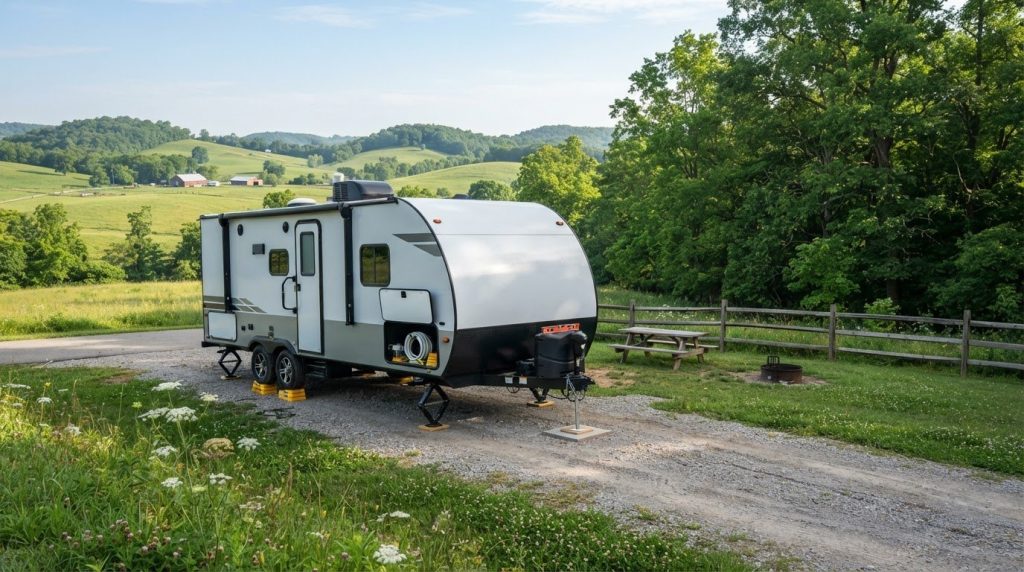
What if the best way to level a rental travel trailer is to use less equipment, not more? Start by choosing the most even campsite available and using the trailer’s supplied equipment and instructions. That approach can make setup simpler, especially when you’re working with an unfamiliar trailer.
You want the trailer positioned safely without risking damage or spending your first hour at camp making repeated corrections. This guide explains how to choose a suitable spot, check whether the trailer is level, and follow a sensible setup order. You’ll also learn the difference between leveling and stabilizing, so you don’t use stabilizer jacks to lift the trailer.
We’ll cover how to check the site, level side to side and front to back, and finish with a stability check. Follow the rental’s instructions, and don’t adjust equipment you’re unsure about. If you’re planning an Ohio getaway, Troyer’s RV delivery and setup service can take some of the work out of arriving at camp, including around Millersburg and Holmes County.
Key Takeaways
- The best way to level a rental travel trailer starts with choosing the most even suitable campsite.
- Use the rental’s supplied leveling equipment and instructions rather than adding unfamiliar gear.
- Know the difference between leveling and stabilizing, and don’t use stabilizer jacks to lift the trailer.
- A simple arrival checklist helps you check the trailer in the right order and avoid repeated corrections.
- For an easier Ohio campsite arrival, Troyer’s RV delivery service includes professional setup.
Why leveling a rental travel trailer matters before you settle in
A campsite doesn’t need to be perfectly flat for your trailer to sit properly. “Level” means reasonably even from side to side and front to back. You’re checking the trailer’s position, not trying to reshape the ground or make every part of the site perfectly flat. Before you park, focus on the area beneath the wheels and the trailer’s intended setup area.
An uneven trailer can make everyday camp tasks less comfortable. You may feel the tilt while sitting or sleeping, and doors or drawers may swing, stick, or fail to stay where you expect. Appliances can also have specific operating requirements, and those vary by appliance and trailer. Follow the rental instructions and appliance manual instead of assuming every refrigerator or other appliance works the same way when tilted.
A travel trailer is one kind of Recreational vehicle (RV), but rental setups can differ. That’s why the best way to level a rental travel trailer is to follow the supplied guidance and use the equipment intended for that trailer, rather than copying a process meant for another rig. A careful check before you unpack can help you avoid redoing the setup later.
How can you tell whether a travel trailer is level?
Use a small bubble level and check in two directions: side to side, then front to back. Place it on a firm surface inside the trailer, such as a counter or floor area, and use the same location each time. Consistent placement makes it easier to compare readings as you adjust the trailer’s position.
A phone’s level tool can offer a rough check, but it shouldn’t replace the rental’s supplied instructions or equipment. Readings can vary depending on how you hold or place the device. If the trailer has a designated spot or method for checking level, use that method.
Check both directions before unhitching or settling into camp if the rental instructions allow it. This gives you a chance to spot a tilt while the trailer is still connected and before you bring out your belongings. If you’re unsure what to adjust, pause and follow the owner’s directions rather than guessing.
Leveling is different from stabilizing
Leveling corrects the trailer’s tilt on the campsite. Stabilizing helps reduce movement after the trailer is positioned. They’re separate steps, and one doesn’t replace the other. A trailer can be level but still move slightly when someone walks inside.
Stabilizer jacks aren’t a substitute for leveling equipment. Don’t use them to lift or level the trailer unless the owner’s instructions explicitly permit it. For a rental, use only the adjustments and equipment described in the setup instructions, and leave unfamiliar controls alone. Once the trailer is positioned, follow the instructions for stabilizing it. This helps you avoid putting strain on equipment in a way it wasn’t meant to handle.
What leveling equipment works best for a rental travel trailer?
The right tool depends on the trailer, the campsite, and the rental instructions. Purpose-built leveling blocks, curved wedges, or a built-in leveling system may suit different setups. Don’t assume a particular tool is included or appropriate just because it works for another trailer. Start with the equipment supplied for your rental and the owner’s directions. The best way to level a rental travel trailer is the method those instructions allow you to use safely.
Keep wheel chocks separate in your mind, too. Chocks help prevent a parked trailer from rolling when placed as directed. They don’t raise a low side or correct a tilt. Follow the rental’s instructions for chocking, and don’t substitute chocks for leveling gear.
Leveling blocks or curved wedges: which approach fits?
Stackable blocks let you add height in small increments beneath a tire. Curved wedges provide a gradual ramp for moving the trailer onto the needed height. Neither style is automatically right for every rental. The trailer’s axle layout and the space around the tires affect what can fit, while the setup instructions determine what’s approved.
Use only equipment rated for the trailer and approved in its directions. Don’t improvise with loose materials or stack equipment in a way the owner hasn’t described. If the supplied equipment doesn’t fit the tire or campsite, stop rather than forcing it into place.
When should a renter avoid using built-in jacks?
Not every jack serves the same purpose. A tongue jack supports and adjusts the trailer’s front when the setup instructions call for it. Stabilizer jacks are generally meant to reduce movement after positioning, not to lift the trailer for leveling. A built-in leveling system is different again, and you should use its controls only as the owner directs.
If you don’t recognize a control or aren’t sure what a jack does, leave it alone. Don’t operate unfamiliar equipment without clear instructions. If a jack or leveling system moves unexpectedly, makes an unusual sound, or doesn’t respond as described, stop operating it and refer to the rental’s setup guidance.
Rental setup isn’t the time to test a new technique or bring extra gear that may not suit the trailer. Keep the process simple: identify the intended leveling equipment, follow its instructions, and use each item only for its stated purpose. That helps you avoid confusing a support point with a lifting point, or a wheel restraint with a leveling tool.
If you’d rather spend less of your arrival sorting out setup, Troyer’s RV rentals include an RV delivery and professional setup service upon arrival. It’s a convenient option for an Ohio trip when you’d like the setup handled for you.
The safest way to level a rental travel trailer, compared
Start with the safest, simplest option: choose a suitable campsite and follow the setup method described in the rental instructions. A flatter parking area can reduce how much adjustment is needed. If the trailer still needs leveling, use only approved portable equipment or a built-in system explained in the owner’s directions. No method makes an unsafe site or unapproved equipment safe.
Here’s how the main approaches compare. The right choice depends on the site and the specific trailer, not on which method sounds fastest.
| Method | When it may help | Main limitation |
|---|---|---|
| Choose a level campsite | When you can inspect and select the trailer’s parking area before positioning | The available spot may still have a slope, soft ground, or obstacles |
| Use approved portable gear | When the instructions allow blocks or wedges for the trailer | Gear must fit the trailer and site, and be rated and used as directed |
| Use a built-in leveling system | When the trailer has one and the owner’s directions explain its operation | Controls and procedures vary; don’t guess or operate unfamiliar equipment |
Think of this as a decision order, not a contest between tools. The best way to level a rental travel trailer is the method permitted by its instructions and suitable for the ground beneath it. Equipment ratings matter, too. Don’t exceed the directions for a block, wedge, or built-in system to compensate for a poor site.
Is choosing a flatter campsite better than adding equipment?
Often, yes. Before positioning the trailer, look over its intended footprint, including the area beneath the wheels. Check for a noticeable slope, soft ground, and obstacles that could interfere with placing the trailer or using its equipment. A site that looks level from the entrance may slope across the parking area, so inspect the exact space where the trailer will sit.
If the spot seems unsafe or unsuitable, don’t try to solve the problem with extra equipment. Choose another suitable position if possible, and follow the rental’s setup guidance.
How do travel trailers without automatic leveling differ?
Many trailers are leveled manually, but rental layouts and equipment vary. Don’t assume a trailer has a particular jack, sensor, or automatic system. Check the owner’s instructions for the specific method and controls. If a built-in system is present, operate it only as directed. If the process isn’t clear, stop and use the rental’s setup guidance rather than experimenting.
Some renters would rather not manage arrival setup themselves. Troyer’s RV delivery service includes professional setup upon arrival, which can make an Ohio trip more convenient. Consider it if you’d prefer to spend less time positioning and setting up the trailer at camp.
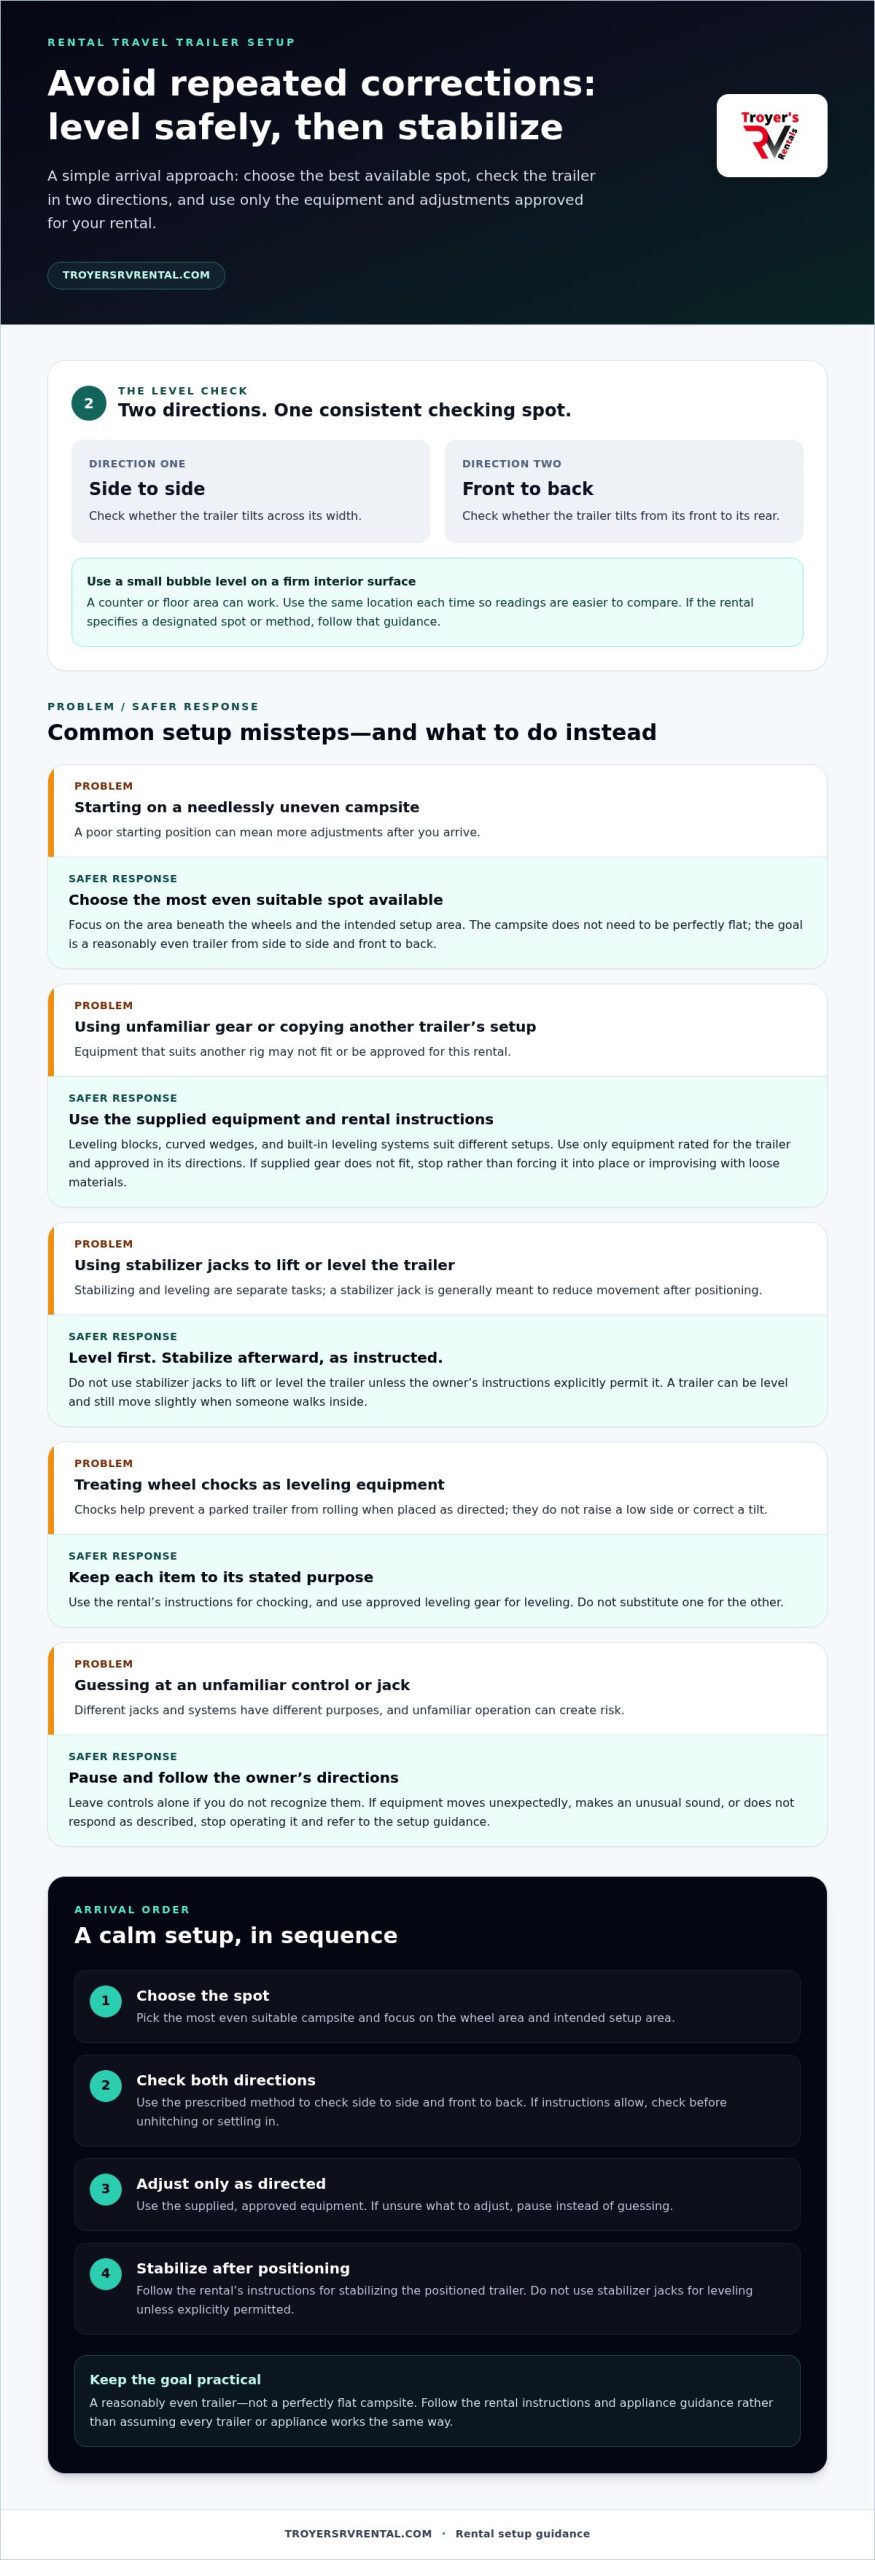
How to level a rental travel trailer step by step
Use this sequence as a renter’s safety check, not as permission to operate every jack or leveling system yourself. The owner’s instructions determine which equipment you can use and who should make each adjustment. If the trailer’s directions call for a different order, follow them. Stop if the site or equipment doesn’t match the setup you were shown.
Check the site and level side-to-side
Inspect the trailer’s full parking footprint before positioning. Look for a cross-slope, soft ground, or obstacles near the wheels and intended setup area. Choose the safest suitable spot you can. Then use the rental’s instructions and a consistent reference point to check side-to-side level before unhitching, if those instructions allow it.
- Choose and inspect the spot. Check the ground where the trailer will sit, not just the approach. If the area appears unsafe or unsuitable, don’t try to fix it with extra equipment. Reposition safely if possible, following the rental’s guidance.
- Check side-to-side level. Follow the supplied directions for where and how to check. If the trailer is level enough, don’t add adjustments just for the sake of it. If it needs correction, continue only as instructed.
- Secure before an adjustment. Before unhitching or making an allowed height adjustment, chock the wheels as directed. Follow the rental’s specific sequence, especially if the trailer needs to move onto leveling equipment. Position chocks so they don’t interfere with that movement.
- Make only the approved side-to-side correction. Use the supplied, approved method, such as designated leveling equipment, if the instructions assign that task to you. Don’t improvise or operate unfamiliar controls. If the gear doesn’t fit or the process differs from the directions, stop.
Secure the trailer, check front-to-back, and stabilize
Once the side-to-side position is set, keep the trailer secured as directed. Use the tongue jack for front-to-back adjustment only if the rental instructions tell you to and the trailer is equipped for that operation. Stabilizers come after leveling. Lower them as directed to reduce movement, never to lift the trailer.
- Check front-to-back level. Use the same level-checking method specified in the rental instructions. If you’re authorized and shown how, make the front-to-back adjustment with the tongue jack. Otherwise, leave that adjustment to the person responsible for setup.
- Set stabilizers and verify. Follow the directions for deploying stabilizers, then recheck the trailer’s position. Stabilizers reduce movement, not tilt. Don’t tighten or extend them beyond the instructions.
The best way to level a rental travel trailer is the safe method you’re authorized to use, in the order the owner provides. If you’d rather leave arrival setup to a professional, choose Troyer’s RV delivery and setup for your Ohio trip.
Make campsite setup easier with an Ohio RV rental
Some travelers enjoy handling every part of the drive and campsite setup themselves. Others would rather arrive with less towing and fewer setup tasks on their minds. Think about your route, comfort level, and how much time you want to spend getting settled. The best way to level a rental travel trailer may be to follow the setup steps yourself, but delivery and professional setup can simplify arrival if you’d prefer to leave that work to someone else.
When can delivery and setup make arrival simpler?
With an RV delivery service, the rental is brought to your destination and professionally set up upon arrival. That suits travelers who don’t want to tow an RV or manage campsite setup after reaching camp. It can also be a helpful fit if you’re planning a relaxed stay near Millersburg or elsewhere in Holmes County and would rather focus on enjoying the area.
Delivery doesn’t remove the value of understanding your campsite or the rental’s instructions. You’ll still want to know how to use the RV and what to do if you have a question during your stay. For trip planning centered on arrival logistics, see the Ohio RV delivery and setup guide.
Plan your rental around the trip, not the leveling gear
Choose the rental type that fits your route and travel group, then plan your arrival around how you’d like to travel. A motorhome may suit a trip where you want to drive your accommodation from place to place. A camper rental may fit a different style of getaway. Consider your itinerary, who’s traveling with you, and whether you want to tow and manage setup yourself or have the RV delivered and professionally set up.
Before you set off, read the rental’s instructions and keep them handy for arrival. They’ll guide you through the equipment and setup steps for that particular RV. If you’re still weighing the larger trip details, the Motorhome rental in Ohio travel guide can help with broader planning.
Planning a getaway in Ohio? Explore Troyer’s RV rentals and delivery service to find an option that suits your trip. Whether you prefer to manage your own arrival or have delivery and setup included, planning ahead can help you spend less time sorting out logistics and more time enjoying camp.
Set yourself up for an easier arrival
Before your next getaway, think about how you want the first hour at camp to feel. A little planning can help you arrive ready to enjoy the trip rather than sorting out decisions on the spot. The best way to level a rental travel trailer is the approach that follows its instructions and fits your comfort level, not the one that requires the most gear.
As you plan, choose the kind of trip you want first. Then decide whether you’d rather manage the arrival yourself or make setup one less thing to handle. That simple choice can shape a more relaxed start, whether you’re headed out for a quiet weekend or a longer Ohio adventure.
Explore Troyer’s RV rentals and delivery options as you plan your next trip. Choose the approach that feels right for you, then look forward to settling in and enjoying the journey.
Frequently Asked Questions
What is the best way to level a rental travel trailer?
The best way to level a rental travel trailer is to choose a safe parking spot and follow the rental’s setup instructions. Check side-to-side position before unhitching if the directions allow, and secure the wheels before any permitted adjustment. Use approved equipment for front-to-back changes, and don’t use stabilizers to lift the trailer. If a control or instruction doesn’t make sense, pause rather than trying a generic method.
Can I use leveling blocks on a rental travel trailer?
You can use leveling blocks if they’re suitable for the trailer and the rental instructions permit them. A block set that fits one trailer’s tires or load may not be right for another. Use equipment rated for the load and place it as directed. Chock the wheels according to the instructions, and don’t substitute scraps of wood, stones, or other improvised materials for approved gear.
Do I level a travel trailer before or after unhitching?
Side-to-side leveling is often handled before unhitching, but the rental’s instructions set the correct order. Before changing the hitch or trailer height, secure the wheels as directed. Front-to-back adjustment may involve a tongue jack, but use it only if the rental guidance permits it. If the instructions say to keep the trailer connected during a check, follow that direction rather than relying on a general online sequence.
Can stabilizer jacks level a travel trailer?
No, stabilizer jacks generally aren’t meant to lift a trailer or correct its tilt. They’re used after positioning to reduce movement. If the trailer still feels uneven, don’t extend the stabilizers farther to compensate, since that could strain the equipment. Stop and review the setup instructions for the approved way to address the uneven position. The owner’s directions take priority over a method that worked on a different trailer.
How level does a travel trailer need to be for the refrigerator?
There isn’t one leveling tolerance that applies to every travel-trailer refrigerator. Requirements depend on the appliance installed, so check its manual or the operating guidance supplied with the rental. Look for instructions that describe level limits or safe operation rather than relying on a rule of thumb from another RV owner. If you’re staying near Millersburg, keep the appliance guidance with your trip notes so it’s easy to find at camp.
What should I do if the rental trailer is still uneven after setup?
Pause before making another adjustment. Recheck your level reading from the same reference point and review the rental’s instructions to see whether the setup matches the approved process. Don’t try unfamiliar jacks, move the hitch, or add improvised materials. If the ground seems unsafe or the setup still doesn’t make sense, don’t force a correction with the equipment. Follow the rental’s support instructions.